Turn Wooden Crates into Onion Gardens—Here’s How
If you’ve ever thought you needed a big backyard to grow onions, think again. With just a few wooden crates, some soil, and a little know-how, you can transform even the smallest outdoor space into a thriving onion patch. This method is not only space-saving but also budget-friendly, and it adds a rustic charm to your garden setup. Ready to grow fresh, flavorful onions right at home? Let’s dig in!
Why Wooden Crates Work for Onions
Onions are versatile, shallow-rooted vegetables that don’t need deep soil to thrive. Wooden crates provide the perfect balance of:
Good Drainage – Prevents soggy soil, which can rot onion bulbs.
Portability – Move crates around to catch more sun or protect against frost.
Sustainability – Repurpose old wooden crates instead of buying expensive pots.
Rustic Aesthetic – Adds charm to patios, balconies, or small backyard gardens.
Choosing the Right Crate
Not all crates are created equal. Here’s what to look for:
Depth: At least 10–12 inches deep for proper bulb development.
Strength: Solid sides that won’t break under the weight of soil.
Material: Untreated wood is best—avoid crates with chemical finishes.
Size: Larger crates allow you to plant multiple onions, but even small ones can work for a handful of bulbs.
Tip: Line the inside with landscape fabric or burlap to prevent soil from spilling out.
Preparing the Crate for Planting
Add a liner – Staple or tuck in burlap/landscape fabric.
Create drainage – Drill a few holes in the bottom if the crate doesn’t already have gaps.
Fill with soil – Use a mix of compost, garden soil, and sand for loose, nutrient-rich earth. Onions dislike compacted soil.
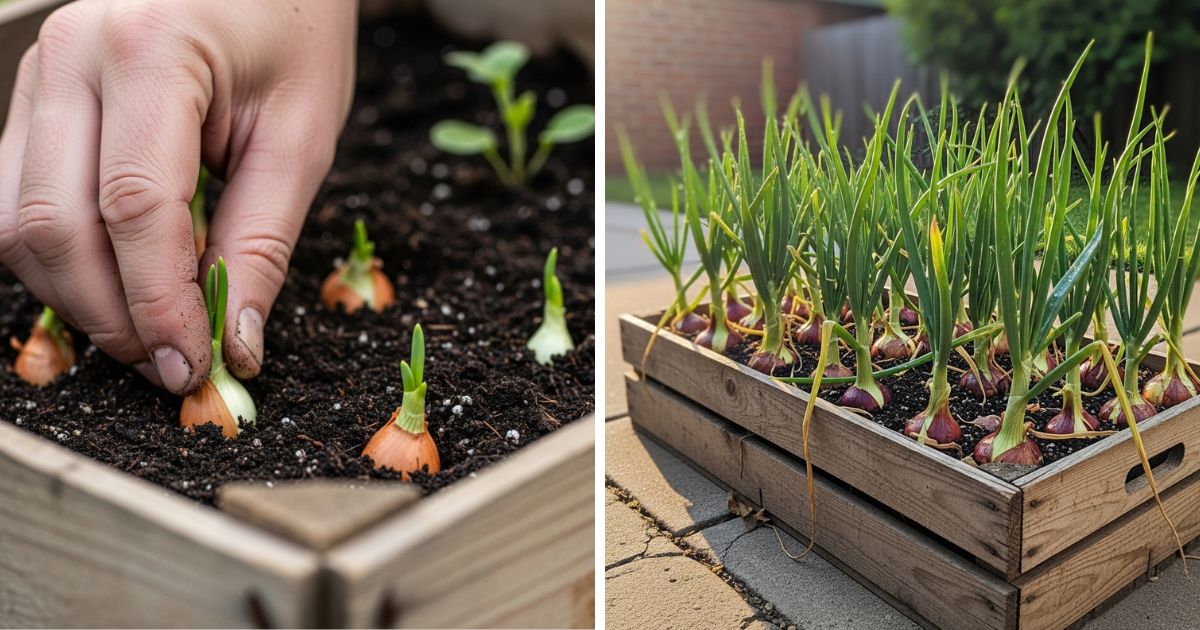
Planting Onions in Crates
Now comes the fun part—getting those onions in the ground (or rather, the crate).
Pick your onions: You can grow from seeds, onion sets, or seedlings. Sets are the easiest for beginners.
Spacing: Plant each set about 4–6 inches apart, with rows spaced 6 inches.
Depth: Bury onion sets 1–2 inches deep with the pointed tip facing up.
Watering: Keep the soil evenly moist, but never waterlogged.
Pro tip: Crates dry out faster than in-ground beds, so check moisture regularly.
Caring for Your Onion Crate Garden
Sunlight: Place crates where they’ll receive at least 6–8 hours of full sun daily.
Watering: Shallow but frequent watering works best.
Fertilizing: Feed with a nitrogen-rich fertilizer every 2–3 weeks until bulbs start to swell. Then switch to a balanced feed.
Weeding: Because crates are compact, weeds are easier to control—just pull them as they appear.
Harvesting Your Onions
Onions are ready to harvest when their tops start to yellow and flop over. Here’s how to do it right:
Stop watering a week before harvest to let bulbs cure in the soil.
Gently lift onions with your hands (or a small fork) rather than pulling to avoid damage.
Lay them out in a warm, dry, shaded spot to cure for 2–3 weeks.
Once the outer skin is papery and dry, trim the tops and store them in a cool, airy space.
Bonus: Companion Planting in Crates
Want to get more out of your crate garden? Pair onions with:
Lettuce – grows quickly and doesn’t compete for nutrients.
Carrots – onions help repel carrot flies.
Herbs like parsley or dill – add fragrance and boost growth.
Final Thoughts
Turning wooden crates into onion gardens is one of the simplest and most rewarding ways to grow your own food. With just a little effort, you’ll have homegrown onions ready to flavor your soups, stews, and salads. Plus, the rustic look of wooden crates makes your backyard or balcony feel like a cozy homestead.
So next time you see an old crate lying around, don’t toss it—plant it!